Requirements: 3ds max
Open the scene. I have 2 props.
Select mental ray as your renderer, under Assign renderer
I have used the standard max material for the toons
The props have been lit with 2 spot lights.
Lets hit render and see what we get.
Now change the standard mat to Ink and paint. And change the
environment color to white.
Lets try and understand the different parameters for this shader
First assign it to the props and render with the default shader settings.
See what you get.
This is what I got.
If we observe carefully, we have 2 paint shades; one light and one dark.
This is because we have the default paint level set to 2, for the shader.
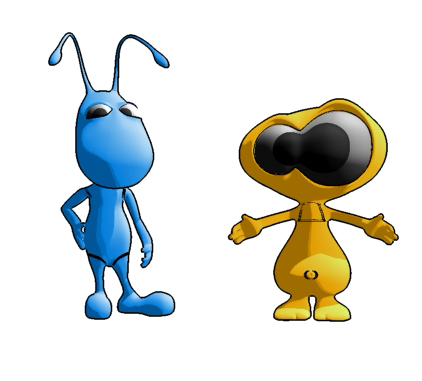
Lets change it to 3 and see what we get.
Better, but it looks a little uneven and separated. So we would use
fall off for the paint, to get a smoother result.
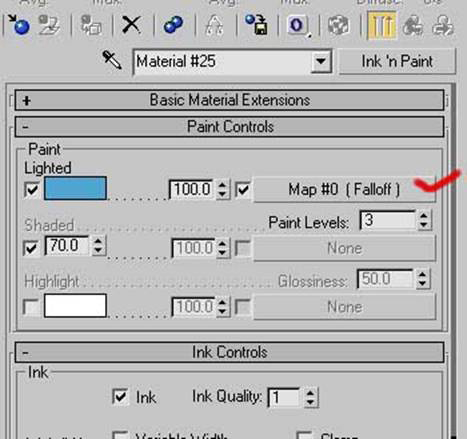
Choose the colors for fall off. And change the fall off type to shadow light.
This is the screenshot of my falloff settings.
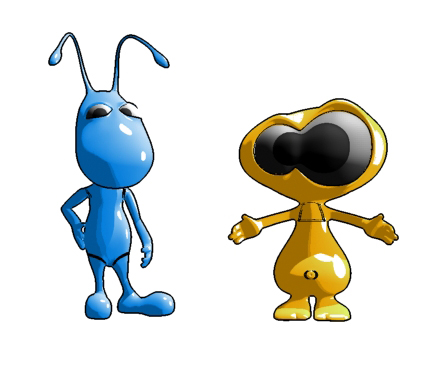
Render.
Lovely. And almost what we were looking for!
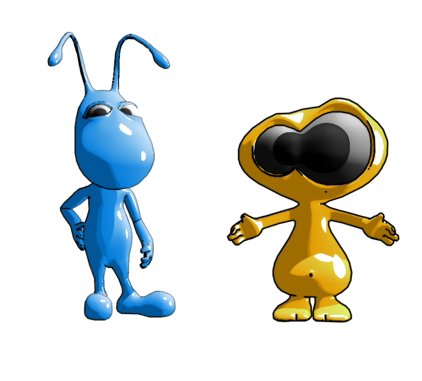
Now these were matte toons. Lets try adding glossiness.
Turn highlights on. Adjust the glossiness.
Interesting.
If you would have read one of my earlier articles, I have explained
about mental ray contour shaders. Lets try using them here.
So instead of ink, lets use Mental ray contour.
Turn the ink off, for the shader. I wont be explaining the contour
shader here. You can check it out at this link
Following are rendered with different contour shaders for mental ray.
Mesh used: Free mesh from www.evermotion.org
All images rendered by Poonam Shah

